Saturday, July 19, 2025

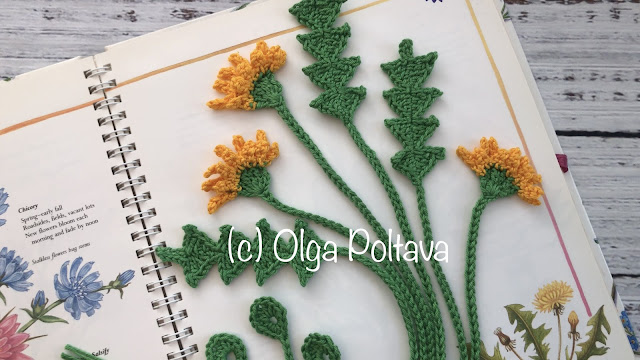
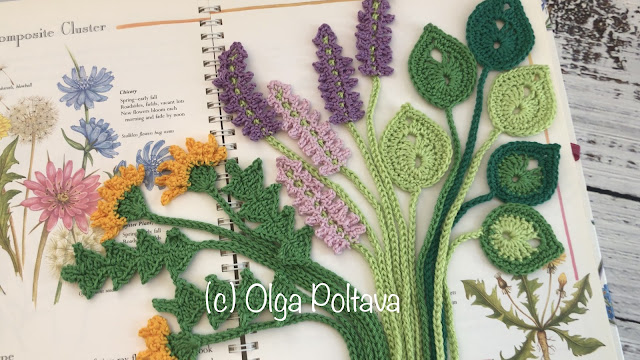
Crochet Dandelion Flower and Leaf Bookmarks. Free Video Tutorial


Summer is such a wonderful time to crochet delicate, nature-inspired pieces — and this season I found myself dreaming up a set of bookmarks inspired by wildflowers and garden leaves. That’s how this sweet little crochet dandelion flower and leaf set came to life! 

These bookmarks are just the right mix of fun and functional. They make lovely handmade gifts, thoughtful keepsakes, or even cheerful additions to your own summer reading stack.


This crochet set includes two separate patterns: a dandelion leaf and a dandelion flower. 

You can use them together as a complete bookmark, or separately for other creative projects. 

Personally, I think they’d look amazing sewn onto a linen pouch or scattered across a cushion cover for a botanical touch.


Materials Used

For both pieces, I used:

  • Yarn: YarnArt Begonia (100% mercerized cotton, Category 2 sport weight)

  • Hook: D / 3.25 mm

  • Tapestry needle, scissors

You’re welcome to substitute a similar cotton yarn — just keep in mind that fiber and hook size will affect the final size and structure.


Both the dandelion leaf and the flower have step-by-step video tutorials on my YouTube channel, so you can follow along easily, even if you’re a visual learner or just starting out.


If you'd like a printable PDF pattern with both written instructions, you can find it in my shops:


The dandelion is part of a growing collection of crochet flower and leaf designs I’m sharing this summer. 

Be sure to check out the lavender flower and broad leaf tutorials if you haven’t yet — and stay tuned, because I have more designs coming soon!


Happy summer and happy crocheting! 

#CrochetBookmark #DandelionCrochet #CrochetLeaf #CrochetFlowers #FreeCrochetTutorial #SummerCrochet #YarnArtBegonia #MercerizedCotton #CrochetForBeginners

Sunday, July 13, 2025

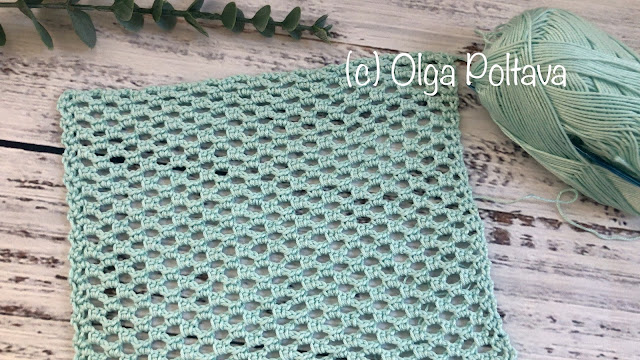
Easy Mesh Crochet Stitch, Free Pattern & Video Tutorial


If you're looking for a light, airy stitch that’s perfect for summer projects, you’re going to love this easy mesh crochet stitch

Whether you’re dreaming of a handmade market bag, a beach tote, or even a breezy cover-up, this stitch creates a beautiful openwork texture that’s both practical and stylish.

This pattern features only two repeating rows, making it beginner-friendly and ideal for quick makes. The result is a strong yet flexible fabric — just right for summer essentials.


YarnArt Begonia – a 100% mercerized cotton yarn, category 2.


Hook size D, 3.25 mm

Multiple of 4, plus 3. (For the sample shown I started with ch 55)


Row 1: sc in 2nd ch from hook, sc in next ch, *ch 3, skip next 2 ch, sc in each of next 2 ch* across.


Row 2: turn, ch 1, sc in 1st sc, ch 2, skip next sc, 2 sc in next ch-3 space, *ch 3, 2 sc in next ch-3 space* across to last 2 sc, end with ch 2, skip next sc, sc in last sc. 


Row 3: turn, ch 1, sc in 1st sc, sc in next ch-2 space, ch 3, *2 sc in next ch-3 space, ch 3* across to last ch-2 space, ends with sc in last ch-2 space, sc in last sc. 


Repeat Rows 2-3 for the pattern.


If you are a visual learner, watch the step-by-step video tutorial on my YouTube channel


Happy crocheting! 


Thursday, July 10, 2025

Exciting News! The Water Lily Summer Top Pattern is Now Available


I’m thrilled to share that the written pattern for my newest design — the Water Lily Lacy Summer Top — is now available in my Etsy and Ravelry shops!

This airy and elegant top has been a true labor of love. Many of you have been eagerly waiting for the pattern, and I didn’t want you to miss the chance to make it while summer is still in full swing. 

So even though the video tutorial is still in the works, the written pattern is ready and up for grabs now!


The Water Lily Top is worked with a beautiful and delicate lace stitch that reminds me of floating water lilies; that’s how it got its name. The stitch creates a lovely texture and drape, and it's available in 11 custom sizes, from XS to 5XL.

Because this lace design depends on full stitch repeats (you can’t just add half a repeat), I developed a special sizing system to preserve the stitch integrity while keeping everything proportional. 

The pattern has already been professionally tech edited, ensuring that it's clear, consistent, and beginner-friendly for those familiar with garment-making.


To ensure everything works as intended, I crocheted the top myself in three different sizes: XS, Small, and XL. I wanted to be 100% sure that the proportions work across different bodies — and they do!

Currently, another talented crocheter is testing the pattern in a Plus Size. Since that’s a larger project, it might take her some time to finish. But because so many of you have reached out wanting to make the top before summer ends, I decided to go ahead and release the pattern now.

The fair market value for a crochet garment pattern like this, worked in a complex lacy stitch and fully graded across all sizes is around $8 on Etsy and Ravelry. 

However, for this early release, I’m offering the pattern at a special price of $5.49.

Once the video tutorial is published, the pattern price will increase to reflect its full value. So if you’d like to make this stunning summer top and save a bit in the process, now is the perfect time to get your copy! You can always redownload the updated version from Etsy or Ravelry!


A video tutorial for the main lace stitch is already available on my YouTube channel, and the full step-by-step garment tutorial is coming soon!

Everything you need to crochet the Water Lily Top is included in the pattern, so you can get started with confidence!

You also have my 100% support! If you have any questions or need help at any point, just reach out and I’ll be happy to assist you.

Happy crocheting! 

Buy this pattern on Etsy

Buy this pattern on Ravelry


Sunday, July 6, 2025

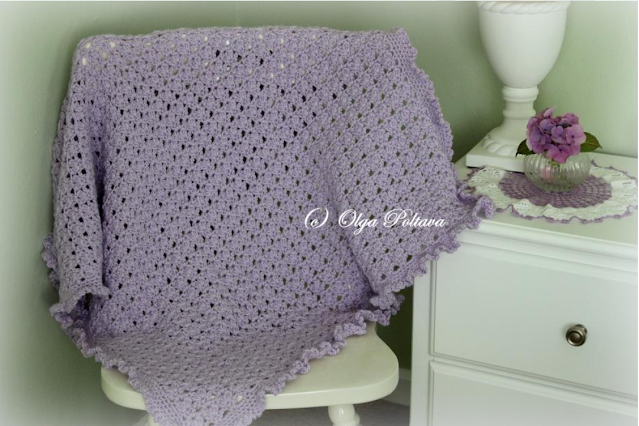
Free Crochet Baby Blanket Pattern for Beginners

I'm happy to share one of my very first crochet designs — a sweet and simple baby blanket pattern I created back in June 2015. This pattern has now been retired from my Etsy and Ravelry shops, and I'm making it available here for free on my blog.

This blanket holds a special place in my heart. It was one of my earliest attempts at designing, and although my style and skills have evolved since then, I still think it’s a charming and cozy project — especially for beginners.

The blanket is worked using easy double crochet clusters, creating a soft, textured fabric with just the right amount of stretch and drape for a little one. 

The yarn I used was Snuggly Wiggly by Loops & Threads (100% acrylic), which is budget-friendly, machine-washable, and comes in gentle baby colors. 

Whether you're looking to make a gift for a baby shower, donate to a hospital, or just want a relaxing weekend project, I hope you enjoy this simple pattern as much as I enjoyed designing it.


Lilac Baby Blanket with Ruffle Trim

Olga Poltava © June, 2015


This pattern may not be redistributed in any form. You are very welcome to sell the finished items that

you make using this pattern.


This pattern is written using US crochet terminology.


Finished Measurements: approximately 38 by 32 inches


Skill Level: Beginner


Materials:

US Hook size F/5 (3.75 MM)

Light worsted yarn, 1260 yards (worsted weight baby yarn will work too)


Abbreviations:

ch chain

sc single crochet

dc double crochet

dc3tog: 3 double crochets finished together (this stitch is also known as 3 dc cluster)

* * Instructions between asterisks should be repeated as many times as there are stitches to

accommodate them.


Ch 124 loosely


Row 1: 3 dc in 6th ch from hook, ch 1, *skip next 3 ch, 3 dc in next ch, ch 1* across, dc in last ch. (30

pattern repeats)


Row 2: ch 3, turn; *(dc3tog, ch 2, dc3tog) all in 2nd dc of next dc-3 group* across, dc in top of turning ch.

(30 pattern repeats)


Row 3: ch 3, turn; 3 dc in next ch-2 space, *ch 1, 3 dc in next ch-2 space* across, dc in top or turning ch.

(30 pattern repeats)


Repeat Rows 2-3 until the blanket measures 36 inches, ending with Row 3.


Trim:

Crochet four rounds of sc evenly around, making 3 sc in each corner space. Start each round with ch 1,

and end by joining with sl st to 1st sc.


Round 5: *ch 3, dc in same sc, sc in next sc* around; join round with sl st.


Fasten off.

Saturday, June 28, 2025

Sneak Peek: Water Lily Crochet Summer Top + Free Stitch Tutorial


Friends, I’m so excited to finally share a glimpse of my newest design — the Water Lily Crochet Summer Top

This lacy, lightweight garment has quickly become one of my favorite creations, and I think you're going to love it too.


The stitch pattern is light, delicate, and just breezy enough for summer — and the way it flows reminds me of blooming water lilies dancing on a quiet pond. That’s how this top got its name — graceful, airy, and effortlessly feminine.


While I’m still putting the finishing touches on the written pattern and step-by-step video tutorial, I’ve already shared a demo of the main lacy stitch used in the top on my YouTube channel

You can start learning the stitch today, try it out, and even begin swatching for your perfect size.


It’s simple to learn and so versatile — perfect for summer tops, shawls, scarves, or whatever project you dream up.

If you're already dreaming about making your own Water Lily Top, you can start by:

  • Watching the tutorial

  • Choosing your yarn (I used Alize Cotton Gold, 55% cotton / 45% acrylic)

  • Grabbing a G (4.25 mm) hook

  • Making a swatch and getting familiar with the stitch repeat


The pattern is now in the hands of a professional technical editor, and once that step is complete, it will be tested in multiple sizes to make sure it fits and looks great on real women.

After that it will be available in my Etsy and Ravelry shops!

This piece is perfect for warm days — breezy, elegant, and light on the skin. Whether you wear it over a tank, dress it up for brunch, or throw it on with jeans, it’s the kind of handmade garment that gets noticed (and asked about!).

Thursday, June 26, 2025

How to Crochet a Lacy Shell Stitch with Treble Crochets (2 Row Repeat)

If you enjoy working with fine cotton thread, you’re going to love this elegant lacy shell stitch

This design uses treble crochets to create a delicate, airy fabric made up of shell shapes and open spaces—perfect for summer accessories, or vintage-inspired lace projects.

Even better? It’s just a 2-row repeat, so it’s super easy to memorize and relaxing to work.


This stitch is beginner-friendly if you’re already comfortable with basic stitches, and it’s a great way to get into thread crochet projects.

Materials Used:

You can even work this pattern with mercerized cotton yarn category 2 and a corresponding size hook. 


Watch the Free Video Tutorial: You can follow along with the full step-by-step tutorial for free on my YouTube channel!


Prefer Written Instructions?

The written pattern (plus symbol chart) is available in both of my shops:

My Etsy Shop – Written Pattern

My Ravelry Store – Written Pattern


Happy summer and happy crocheting! 

Monday, June 23, 2025

Mesh and Puff Stitch Shawl, Free Crochet Pattern


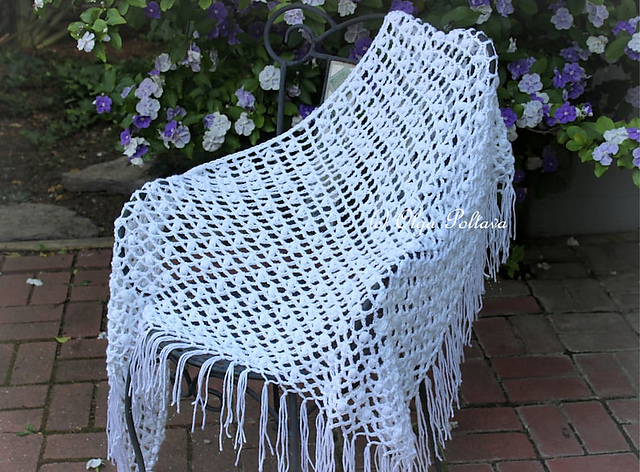
I’m excited to share one of my older designs with you — now available for free here on the blog! This shawl pattern was originally created back in March 2016, and it holds a special place in my crochet journey. 

It’s worked with worsted weight yarn and a 4.25 mm (G) hook, making it a cozy yet airy accessory that’s perfect for layering. The combination of mesh and puff stitches gives it beautiful texture and drape, while keeping the project interesting and fun to make. I hope you enjoy revisiting (or discovering!) this classic pattern.


Lace Puffs Crochet Shawl Pattern
Olga Poltava © March, 2016


This pattern is written using US crochet terminology.


Finished Measurements: approximately 74 inches wide and 34 inches long (not including fringe)


Skill Level: Advanced beginner


Materials:
US Hook size G/6 (4.25 MM)
Worsted yarn, about 820 yards


For the shawl shown above I used Caron Simple Soft Party, 5 balls (3 oz each ball)


Gauge: not important


Abb
reviations:
ch chain
sc single crochet
dc double crochet
sl st slip stitch
puff: (yarn over, insert hook and draw a loop) in the same space 4 times, yarn over and draw yarn
through eight loops, holding the 9th loop on the hook, then yarn over and draw yarn through two loops.
* * Instructions between asterisks should be repeated as many times as there are stitches to accommodate them.


Ch 3, join in ring with sl st.

Row 1: ch 8 (counts as 1st dc and ch-5), dc in ring, ch 5, dc in ring.

Row 2: ch 8, turn (counts as 1st dc and ch-5); sc in next ch-5 space, ch 5, dc in next dc, ch 5, sc in next ch-5 space, ch 5, dc in 3rd ch of turning ch-8. (Here and in every following row, remember that we treat each 
turning ch-8 as a dc and ch-5)

Row 3: ch 8, turn (counts as 1st dc and ch-5); sc in next ch-5 space, ch 2, puff in next sc, ch 2, sc in next 
ch-5 space, ch 5, dc in next dc, ch 5, sc in next ch-5 space, ch 2, puff in next sc, ch 2, sc in next ch-5 
space, ch 5, dc in 3rd ch of turning ch-8.

Row 4: ch 8, turn (counts as 1st dc and ch-5); sc in next ch-5 space, ch 5, sc in top of next puff, ch 5, sc in 
next ch-5 space, ch 5, dc in next dc, ch 5, sc in next ch-5 space, ch 5, sc in top of next puff, ch 5, sc in next 
ch-5 space, ch 5, dc in 3rd ch of turning ch-8.


Row 5: ch 8, turn (counts as 1st dc and ch-5); sc in next ch-5 space, ch 2, puff in next sc, ch 2, sc in next 
ch-5 space, ch 5, sc in next ch-5 space, ch 2, puff in next sc, ch 2, sc in next ch-5 space, ch 5, dc in next
dc, ch 5, sc in next ch-5 space, ch 2, puff in next sc, ch 2, sc in next ch-5 space, ch 5, sc in next ch-5 space, 
ch 2, puff in next sc, ch 2, sc in next ch-5 space, ch 5, dc in 3rd ch of turning ch-8.

Row 6: ch 8, turn (counts as 1st dc and ch-5); sc in next ch-5 space, ch 5, *sc in top of next puff, ch 5, sc in 
next ch-5 space, ch 5* across to middle dc, dc in next dc, ch 5, sc in next ch-5 space, ch 5, *sc in top of
next puff, ch 5, sc in next ch-5 space, ch 5* across to end, dc in 3rd ch of turning ch-8.

Row 7: ch 8, turn (counts as 1st dc and ch-5); *sc in next ch-5 space, ch 2, puff in next sc, ch 2, sc in next 
ch-5 space, ch 5* across to middle dc, dc in next dc, ch 5, *sc in next ch-5 space, ch 2, puff in next sc, ch
2, sc in next ch-5 space, ch 5* across to end, dc in 3rd ch of turning ch-8.


Continue crocheting Rows 6-7 increasing the amount of ch-5 spaces and puffs in each row, until your 
triangle measures about 33 inches long, ending with Row 6.

Crochet one row of sc across the longest side of the triangle, make 2 sc in each ch-space. Fasten off.

Fringe:

Cut yarn into strands 16 inches long.

Lay shawl on a flat surface. Take two strands of yarns at a time and attach fringe into every ch-5 space of the edging. Then tie the fringe into knots as shown in the picture below.