Thursday, December 15, 2016

Calendula Baby Hat Crochet Pattern


Most of the patterns in my Etsy shop are baby hats. And I've been getting requests for new ones, which is a nice thing of course. It's nice to know my patterns are useful. 

I finished this one just a couple of days ago. I named it Calendula Baby Hat. It's actually quiet difficult to come up with a unique name (a lot of patterns in my shop are simply names Baby Hat Pattern, which sometimes creates confusion for my customers). 

When I picked a few Calendula flowers from my backyard to add as a back prompt for the photo, the name seemed to be right there. This hat is bright and cheerful but simple, just like Calendula flowers. 

The pattern is for size 0-3 months (about 14 inches in circumference and 6 inches in height), but it can be adjusted to a bigger size simply by using a bigger size hook and/or heavier yarn.

I used category 3, baby yarn by Plymouth Yarn called Dreambaby DK. 

The pattern is available in my Etsy shop


Wednesday, November 30, 2016

Chilly Weather, Crochet Shawl, and Walking with a Friend


Finally, the chilly days arrived to California. Right in time, as it's the Holiday Season!

I got to wear my new crochet shawl! 

Every week a friend of mine and I go for a walk in a park. It's such a simply, yet wonderful way to connect, to share some laughs, to get some exercise and fresh air. 

My friend snapped these pictures of me. My goodness, I knew I have quite a bit of gray hair, but I didn't realize how much it shows. 
Oh well, growing old is part of life :)


Thursday, November 17, 2016

Crochet Square for a Special Blanket


I made this crochet square the day before yesterday, and today I mailed it all the way to the UK. 

With many other green crochet squares coming from all over the UK and perhaps other parts of the world, it will be used for making a blanket for a little boy Daniel, who's in an intensive care in the hospital. 

I joined this project through a crochet group on Facebook. Two wonderful ladies who announced it, will join the squares into a blanket.


I know, from the economical point of view, it doesn't make sense to send a small crochet square over the seas, all the way from California to the UK. But this is not about that.

This is my way of saying to this family: "I don't know you, I don't know your little boy. I can't help you in any significant, meaningful way. But I am not indifferent to your pain, and to the struggles you are going through."


Several years ago, my oldest son was diagnosed with autism. The doctors who gave the diagnosis were like: "Have you ever heard of autism? Well, your son has it. Here are some Internet links where you can learn more. Good luck."

Back then I felt like I have this tragedy in my life, and nobody cares!
 It was such a difficult experience. But with time I learned that my son's diagnosis is not a tragedy, but a challenge. You adapt to it, you make the best out of it, and you go on.

I also learned how important it is to have a network of family and/or friends who can give you support through the difficult times. And it's important to offer your support, no matter how small or insignificant, to other people. 


~~~~~~~~~~~~~~~~~~~~~~~


Cluster: *yarn over, insert hook and pull up a loop, yarn over and draw thorough 2 loops on hook* six times, yarn over and draw through 6 loops on hook, yarn over and draw through two loops on hook.

Ch 8, join with sl st in ring.

Round 1: ch 3 (counts as 1st dc here and in following rounds), 3 dc in ring, cluster in ring, cluster in ring, *4 dc in ring, cluster in ring* three times; join with sl st to first dc.

Round 2: ch 3, dc in same st, dc in next 3 dc, 2 dc in next cluster, ch 1, *2 dc in next dc, dc in next 3 dc, 2 dc in next cluster, ch 1* around.; join.

Round 3: ch 3, dc in same st, dc in next dc, (cluster in next dc, dc in next dc) twice, 2 dc in next dc, ch 2, *2 dc in next dc, dc in next dc, (cluster in next dc, dc in next dc) twice, 2 dc in next dc, ch 2* around; join. 

Round 4: ch 3, dc in same st, dc in next 2 dc, (dc in next cluster, dc in next dc) twice, dc in next dc, 2 dc in next dc, ch 2, *2 dc in next dc, dc in next 2 dc, (dc in next cluster, dc in next dc) twice, dc in next dc, 2 dc in next dc, ch 2* around; join.

Round 5: ch 3, dc in same st, dc in next 2 dc, (cluster in next dc, dc in next dc) three times, dc in next dc, 2 dc in next dc, ch 3, *2 dc in next dc, dc in next 2 dc, (cluster in next dc, dc in next dc) three times, dc in next dc, 2 dc in next dc, ch 3* around; join.. 

Round 6: ch 1, sc in same st, *sc in each dc and in each cluster across to next ch-3 space, 5 sc in ch-3 space* around; join.

Round 7: ch 1, *sc in each sc to next corner, 3 sc in corner sc* around; join.

Round 8: same as Round 7. 


Thursday, November 10, 2016

Shells Newborn Dress Free Crochet Pattern


I constantly add new pattern to my shop, and I also "retire" some. Here is one such pattern! I hope you'll enjoy making this newborn dress!


Olga Poltava © December, 2015

This pattern may not be redistributed in any form. You are very welcome to sell the finished items that you make using this pattern.

This pattern is written using US crochet terminology.

Size: Newborn

Skill Level: Beginner

Materials:

US Hook size E/4 (3.50 MM)

Super fine yarn, about 150 yards in each color

For the dress shown above I used Woolike by Loops & Threads

Small button

Gauge: 9 dc = 2 inches, 3 rows = 1 inch in height

Abbreviations:

ch chain

sl st slip stitch

sc single crochet

dc double crochet

* * Instructions between asterisks should be repeated as many times as there are stitches to accommodate them or as many times as stated.

When changing color yarn, don’t cut off the yarn after each round, let it hang until you use it again in the next round.

Ch 53.

Row 1: dc in 4th ch from hook (first 3 skipped ch count as 1st dc), dc in each ch across. (51 dc).

Row 2: ch 3, turn (counts as 1st dc), dc in next 2 dc, *2 dc in next dc, dc in next 3 dc* across. (63 dc).

Row 3: ch 3, turn (counts as 1st dc), 2 dc in next dc, *dc in the next 2 dc, 2 dc in next dc* across, dc in last dc. (84 dc).

Row 4: ch 3, turn (counts as 1st dc), 2 dc in next dc, *dc in the next 3 dc, 2 dc in next dc* across, dc in last 2 dc. (105 dc).

Row 5: ch 3, turn (counts as 1st dc), 2 dc in next dc, *dc in the next 4 dc, 2 dc in next dc* across. (126 dc).

Join with sl st to 3rd ch of beginning ch-3 and continue crocheting in rounds.

Round 6: ch 3, 2 dc in same beginning space, skip next dc, sc in next dc, *skip next dc, 3 dc in next dc, skip next dc, sc in next dc* around, join with sl st to 3rd ch of beginning ch-3. (32 shells).

Round 7: sl st to 2nd dc of dc-3 group, change color, ch 1, sc in same dc, 5 dc in next sc, *sc in 2nd dc of next dc-3 group, 5 dc in next sc* around; join with sl st to 1st sc. (32 shells).

Round 8: sl st to 3rd dc of next dc-5 group, change color (do not cut off the second color yarn, let it hang along until you use it again in the next round), ch 1, sc in same dc, *5 dc in next sc, sc in 3rd dc of next dc-5 group* four times, ch 5, skip next 6 shells, sc in 3rd dc of next shell, *5 dc in next sc, sc in 3rd dc of next dc-5 group* nine times, ch 5, skip next 6 shells, sc in 3rd dc of next shell, *5 dc in next sc, sc in 3rd dc of next dc-5 group* five times; join with sl st to 1st sc. (18 shells, two ch-5 spaces)

Round 9: sl st to 2nd dc of dc-5 group, change color, ch 1, sc in same dc, *7 dc in next sc, sc in 3rd dc of next dc-5 group* four times, sc in 3rd ch of next ch-5, 7 dc in next sc, *sc in 3rd ch of next dc-5 group, 7 dc in next sc* nine times, sc in 3rd ch of next ch-5, 7 dc in next sc, *sc in 3rd ch of next dc-5 group, 7 dc in next sc* five times; join with sl st to 1st sc. (20 shells)

Round 10: sl st to 4th dc of dc-7 group, change color, ch 1, sc in same dc, 7 dc in next sc, *sc in 4th dc of next dc-7 group, 7 dc in next sc* around; join with sl st to 1st sc. (20 shells)

Rounds 11-32: repeat Round 10. You can also make the dress longer if you wish.

Fasten off.

Attach yarn to top right corner of the back opening and continue crocheting into ends of rows: (sc, ch 4, sc) in first end of row (this creates a button loop), 2 sc in each end of row down and up the opening. Fasten off, weave in end. Sew the button on the other side of the opining.

Thursday, November 3, 2016

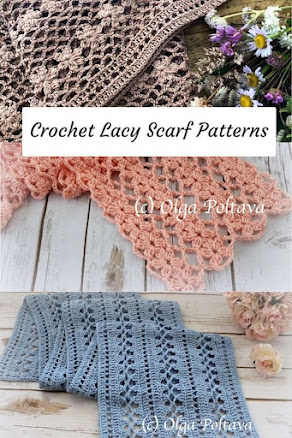
Bright Pink Shells Crochet Scarf


This is the same stitch that I used for the Blue Lace Baby Blanket, but I adjusted it for a shawl. 

Well, it's a bit too wide to be a shawl; it's more of a triangular scarf I guess.


The finished measurements are 60 inches wide and 23 inches long.

Shawl or scarf, I think I'll get some wear out of it this fall and winter. I just need to be patient and wait for the weather to cool down. Here in Northern California we still have summer-like days.


I used Caron Simply Soft Light yarn and size G/4 (4.25 mm) hook. 


I'm pleased with how it turned out, and I wanted to make another one for my friend. 

I don't know what I was thinking! Usually I'm not a big fan of variegated yarns, yet this Red Heart Soft really appealed to me. Wrong choice!

I'll have to think of something I could use this yarn for. Because it clearly doesn't work for this pattern. 


The pattern for Bright Pink Shells Scarf is available in my Etsy shop


Sunday, October 30, 2016

My First Caron Cakes in Cherry Chip. Yarn Review


I'm sure you've heard about Caron Cakes by now. And if you have not, let me tell you how wonderful they are. 

Disclosure: this is not a paid review, and I wasn't compensated for it in any way. I simply want to share my own experience. 


I bought my first ever Caron Cakes roll of yarn in Cherry Chip color a few days ago. Today, I bought my second roll in the same color so I could finish my project.

This yarn is made of 20% wool and 80% acrylic. There are 7.1 oz (200 g) in each roll. That's approximately 383 yards or 350 meters. 

One roll should be enough for a smaller project like a scarf, or maybe a couple of hats. But for a bigger project, such as a baby blanket, you will need at least two if you are using an open, lacy stitch. For something more dense, you'll need three rolls, perhaps even more depending on the size. 


Here is what I love about this yarn:


  • It's soft to touch and easy to work with.
  • The colors are bright and beautiful.
  • This yarn is self striping. It has a very abrupt color change, which most variegated yarns don't.

Here is what I don't love about this yarn:
  • The price! $7.99 for 7.1 oz is pricey. Let's say you want to make a dense stitch baby blanket. The cost of yarn would be at least $24 (plus tax). Ouch! 
  • Because this yarn has 20% wool, the finished items should be hand washed. Let's say you gift the pricey baby blanket mentioned above to a busy new (or not new) mom. I doubt she'll have time for all the hand washing. 

But! 

As I mentioned above, I already bought two rolls of Caron Cakes, and I do intend to buy more. This yarn is sold at Micheal's exclusively. But did you know that Michael's offers coupons all the time? You can always find one online, and they accept them on smart phones. Hint, hint.

I can think of many beautiful items that can be made from this yarn that won't require frequent washing. For example, a gorgeous, special occasion shawl or a bright winter poncho would only need to be cleaned/washed once a season.


Tuesday, October 18, 2016

Newborn Baby Crochet Sweater


It took me a while to make this newborn baby sweater. I used super fine (category 1, fingering) yarn and a small size hook, so the work was moving quite slowly. 

Also caring alone two yarns (blue and white) was an added challenge. It would've been easier to make it one color, but I don't think it will be this pretty. I really like how the blue and white stripes look. 

And this is my "baby" wearing his new sweater. It's a bit too big, but I'm so hopeful the "baby" will grow! *wink* 


Monday, October 10, 2016

Baby Alpaca Wool Autumn Scarf


I made a super warm and cozy scarf/shawl using a baby alpaca wool. But the weather here in Nor-Cal is still summer-like. Hopefully cold days will arrive soon. I'm all ready!


Finished Measurements: 60 inches wide (not including fringe) and 21 inches long (not including fringe).


The pattern is available in my Etsy shop.  


Tuesday, September 6, 2016

Blue Lace Baby Blanket


Here is a small blanket that I made for my doll.

It's very light and airy in texture.

I used fine (fingering, category 1) crochet yarn. Specifically, I used two balls of Woolike by Loops & Threads and a size E/4 (3.5 mm) crochet hook.


This is a very beautiful stitch that involves front post and back post double crochets. This stitch can be adjusted for many other crochet patterns.


Thursday, September 1, 2016

Whipped Cream Dress, Free Pattern from Leisure Arts


When I saw the free pattern for this dress, I instantly dropped all the other crochet projects that I was working on. I just knew I must make it! 


It only took me a few days. I posted my progress in Crochet Gate group on Facebook and I got lots of compliments and positive feedback. Thank you! I also got some questions. 

So I thought I should make a post and address some of the most trickiest parts of this pattern. 


The free pattern comes from Free Pattern Friday Crochet, a free online newsletter by Leisure Arts. I loved this pattern so much, that I actually signed up for this newsletter, and I'm looking forward to more patterns from Leisure Arts.


The pattern comes in size 12-18 months. 

It calls for baby fingering weight yarn and hooks size D (3.00 mm) and E (3.5 mm).

I used Woolike yarn by Loops & Threads.

I can't say exactly how much yarn I used (my yarn came from another project that I wasn't happy with and had to unravel. Yep, things like that happen to me often).


Here are some notes that might be useful:

After I completed the first four rows, I realized that my piece is not symmetric. Somehow I had more dc(s) on one side than on the other. "Arhh, I thought, I must've made a mistake!" So I unraveled my work and started over, just to realize that once again my piece is not symmetric.

So I took a careful look at the pattern, glancing at rows and rounds ahead, and I realized that this dress has a placket, and those extra double crochets on one side are precisely for that. 

So, don't unravel your work when you realize the piece is not symmetric. That's how it's supposed to be!

When you get to Round 1, you will leave those extra 6 dc unworked. And that's your placket. 

One of crochet friends from Crochet Gate group asked me about Round 14. At the beginning of the round, the pattern says "dc in next 3 dc" and later in the same round it says "dc in next 4 dc." She was confused where those 3 dc and 4 dc come from. 

Perhaps it will be easier if you read that round this way:

Round 14: Ch 3, dc in next dc, skip next ch-3, sc and ch-3, dc in next 2 dc, ch 1, (dc in next dc, ch 1) 7 times, * dc in next 2 dc, skip next ch-3, sc and ch-3, dc in next 2 dc, ch 1, (dc in next dc, ch 1) 7 times; repeat from * around; join with slip st to first dc.

I also tried to show it in the picture bellow. See how 4 dc come together (Sorry for the quality of the photo. I took it last night past the sunset, so the lighting is bad.)


I had a bit of confusion at Round 35 (last round). In this round clusters are used. And I always think of crochet clusters as something like dc3-tog or some sort of variation of it. But in this pattern, clusters are different. Make sure to carefully read the instructions for special stitches used in this pattern. 

Now back to the placket. Seems like some people had trouble with it. So perhaps some visual help will be useful. 

Here is what it looks like. 
When working on finishing, after completing Row 2 of buttonhole band, leave a tail long enough to sew the bottom of the placket to inside of the buttonhole band. I used a tapestry needle for that. 


Here is what the back of the dress looks like when bottom of the placket is sewn in place and buttons added. (I didn't have white buttons on hand, so I went with pink ones. White ones would probably look better.)


I think this is it! I love the way my Whipped Cream Dress turned out, and I enjoyed making it. 

I hope my notes and suggestions will be useful to my crochet friends who are working on this pattern too. 

Happy Crocheting! 

Olga

P.S. If you have any other questions, you can ask me in the comments bellow. But hurry, while this pattern is fresh in my head :)


I'm linking to
Crafting Along @ Be a Crafter

Sunday, August 21, 2016

Simple Crochet Square, Free Pattern


I tried to recreate the crochet square pattern for this vintage afghan. Hmm, looks like I made the beginning chain ring too big. I started with chain 8, but chain 5 would probably work better. 

Anyway, I'm sharing my pattern below.


Ch 8 (or better 5), join with sl st in ring.

Round 1: ch 2, dc2-tog in ring (counts as 1st cluster), ch 5, *dc3-tog, ch 2, dc3-tog, ch 5* three times, dc3-tog, ch 2, join with sl st to 1st cluster.

Round 2: sl st in next ch-3 space, ch 2, dc2-tog (counts as 1st cluster), ch 3, dc3-tog in same ch-3 space, *ch 2, 3 dc in next ch-2 space, ch 2, (dc3-tog, ch 3, dc3-tog) all in next ch-3 space (corner)* three times, ch 2, 3 dc in next ch-2 space, ch 2, join with sl st to 1st cluster.

Round 3: sl st in next ch-3 space, ch 2, dc2-tog, ch 3, dc3-tog in same ch-3 space, *ch 2, 2 dc in next ch-2 space, dc in next 3 dc, 2 dc in next ch-2 space, ch 2, (dc3-tog, ch 3, dc3-tog) all in next ch-3 space (corner)* three times, ch 2, 2 dc in next ch-2 space, dc in next 3 dc, 2 dc in next ch-2 space, ch 2, join with sl st to 1st cluster.

Round 4: sl st in next ch-3 space, ch 2, dc2-tog, ch 3, dc3-tog in same ch-3 space, *ch 2, 2 dc in next ch-2 space, dc in next each dc across, 2 dc in next ch-2 space, ch 2, (dc3-tog, ch 3, dc3-tog) all in next ch-3 space (corner)* three times, ch 2, 2 dc in next ch-2 space, dc in each dc across, 2 dc in next ch-2 space, ch 2, join with sl st to 1st cluster.

Round 5: same as Round 4, but you will have more dc across. 

You can actually add more rounds if you wish. Simply continue crocheting as Round 4, but in each round you'll have more and more dc across. 


Wednesday, August 17, 2016

Flower Clusters Diaper Cover


I had another request for a diaper cover pattern that would match the blanket and the hat. So here is its. 

It's quite simple and quick to make. 


Monday, August 15, 2016

Delicate Lace Crochet Baby Hat, Free Pattern from Pinterest


I think this is one of the most beautiful crochet items I've ever made!

I made this hat for a friend's baby. I'm sure it will look adorable on her. I was thinking about adding a flower, but this lacy stitch is so beautiful, it doesn't really need any other embellishments.

I came across this symbol chart (crochet diagram) for this hat on Pinterest. Click here to see it.


I used super fine, category 1, cashmere yarn and a size D/3 (3.25 mm) crochet hook. 
I can't say exactly how many yards of yarn I used. Not many, as the stitch is very open and light in texture. 

I tried the pattern twice. The first time my hat was coming out too big. So at the second attempt, in first round I started with 12 dc in ring instead of 16.
The rest of the pattern worked out the same and my hat came out the right size I needed - about 16 inches in circumference and 6.5 inches in height. 

I made a trim different from the one in the original pattern. I tried that one and I didn't like it. So I simply made a few rounds of single crochets.

This is not an easy pattern. It involves front post double crochets and crossed double crochets. And of course, it involves the ability to read/follow crochet charts.


Monday, August 8, 2016

Star Stitch White and Pink Baby Set, Baby Afghan and Baby Hat


When I made this baby blanket, I just knew it would look so much better in white. So here is a baby set that I made for a friend's baby. 


I also added a flower appliqué both to the blanket and to the hat. 


My very detailed pattern is available on Ravelry, Etsy, and Craftsy

Wednesday, July 27, 2016

Crochet Doll Basket and SanyDoll Reborn Baby Doll Review


Disclosure: This is not a paid or sponsored review. I was not in any way compensated for writing it. I purchased the doll and I post this review because I solely want to share my own opinion. 


This little precious thing is going to be my new model for crohcet newborn and doll outfits. 

I purchased this doll through Amazon for $89.99
Quite pricey, but well worth it!

Some of the dolls there look incredibly realistic, which to me is unsettling. So I chose a doll that cannot be mistaken for a baby.

The doll measures 18 inches in length, about the size of a small newborn. 

The doll came in a lovely knitted sweater and hat outfit, cute onesie and adorable socks. It has a magnetic pasifier, a small bottle, and a cute elephant pillow. 

I was surprised how much interest my sons (who are 7 and 5) showed towards the doll. They actually like giving it its pacifier and bottle. They hold the doll very carefully and give it soft kisses. So cute!


And here is the first crochet item I made for my doll. I made this basket with super soft and chunky Bernat Baby Blanket Yarn and size K/10.5 (6.5 mm) hook. 

This basket measures 18 inches long and 11 inches wide. I don't think this is a suitable item for a real baby (perhaps only as a photography prompt), but it's perfect for a doll or perhaps a kitten. 

It's very easy and quick to crochet. 


Monday, July 25, 2016

Mint Pineapples Doily, Free Vintage Doily Pattern


I used 1.25 mm steel hook and Aunt Lydia's crochet thread size 10. 

My doily came out 16 inches across. When I was making it, after the 11th round it began to ruffle quite a bit. But once I finished the doily and blocked it, it turned out perfectly flat and beautiful. 

The vintage pattern is from Hand Crochet by Roayl Society, Crisp New Doilies Book No 9, 1948.


Starting at center, ch 12. Join with sl st to form ring.

1st rnd: Ch 3, 23 dc in ring. Join with sl st to 3rd st of ch-3.

2nd rnd: Sc in same place as sl st, (ch 6, skip 3 dc, sc in next dc) 6 times; sl st in first sc.

3rd rnd: In each sp around make sc, half dc, dc, 4 tr, dc, half dc and sc. Join to first sc (6 petals).

4th rnd: Ch 6, dc in same place as sl st, * ch 5, between next 2 petals make dc, ch 3 and dc. Repeat from * around, ending with ch 5. Join to 3rd ch of ch-6.

5th rnd: Ch 3, make * 6 dc in ch-3 sp, dc in next dc, ch 5, dc in next dc. Repeat from * around. Join.

6th rnd: Ch 3, holding back on hook the last loop of each dc, make dc in next 7 dc, thread over and draw through all loops on hook (cluster made), * ch 7, sc in next sp, ch 7, make a cluster as before over next 8 dc. Repeat from * around. Join.

7th rnd: Sl st to center of loop, sc in same loop, * ch 7, sc in next loop. Repeat from * around. Join.

8th rnd: Ch 4, holding back on hook the last loop of each tr make a 3-tr cluster in same place as sl st, ch 4, make another 3-tr cluster in same place as last cluster was made, * ch 7, in next sc make cluster, ch 4 and cluster. Repeat from * around. Join.

9th rnd: Sl st to center of next sp, sc in same sp, * ch 5, in center st of next chain make dc, ch 3 and dc (shell made); ch 5, sc in next sp. Repeat from * around. Join.

10th rnd: Sl st in next 2 ch, sc in next ch, * ch 3, shell in sp of next shell (shell made over shell); (ch 3, sc in center st of next ch-5) twice. Repeat from * around. Join.

11th rnd: Sl st in next 3 ch, in next dc and in sp of shell, ch 6, dc in same sp (starting shell made over shell), * ch 3, skip ch-3 sp, 8 tr in next sp, ch 3, shell over shell. Repeat from * around. Join.

12th rnd: Sl st in next sp, * shell over shell, ch 3, (tr in next tr, ch 1) 7 times; tr in next tr, ch 3. Repeat from * around. Join.

13th rnd: * Shell over shell, ch 3, sc in next tr, (ch 4, sc in next tr) 7 times; ch 3. Repeat from * around. Join.

14th rnd: * Shell over shell, ch 3, sc in ch-4 loop, (ch 4, sc in next loop) 6 times; ch 3. Repeat from * around. Join.

15th rnd: * Shell over shell, ch 3, sc in ch-4 loop, (ch 4, sc in next loop) 5 times; ch 3. Repeat from * around. Join.

16th rnd: Sl st in next sp, ch 6, in sp of same shell make dc, ch 3 and dc (2 shells made); * ch 3, sc in ch-4 loop, (ch 4, sc in next loop) 4 times; ch 3, in sp of next shell make (dc, ch 3) twice and dc (2 shells made). Repeat from * around. Join.

17th rnd: * Shell over shell, ch 3, shell over next shell, ch 3, sc in next loop, (ch 4, sc in next loop) 3 times; ch 3. Repeat from * around. Join.

18th rnd: * Shell over shell, ch 1, shell in next sp, ch 1, shell over shell, ch 3, sc in next ch-4 loop, (ch 4, sc in next loop) twice; ch 3. Repeat from * around. Join.

19th rnd: * (Shell over shell, ch 3) 3 times; sc in ch-4 loop, ch 4, sc in next loop, ch 3. Repeat from * around. Join.

20th rnd: * (Shell over shell, ch 3, dc in next sp, ch 3) twice; shell over shell, ch 3, sc in next ch-4 loop, ch 3. Repeat from * around. Join.

21st rnd: * Shell over shell, ** (ch 3, dc in next sp) twice; ch 3. Repeat from * once more, (shell over shell) twice. Repeat from ** around. Join.

22nd rnd: Sl st in next sp, ch 4 (to count as tr), and complete a 3-tr cluster in same sp, * ch 6, skip next sp, (make 3-tr cluster in next dc) twice; ch 6, shell over shell, ch 6, skip next sp, (cluster in next dc) twice; ch 6, (cluster in sp of next shell) twice. Repeat from * around. Join.

23rd rnd: Ch 4, and complete a cluster in same place as sl st, (ch 5, cluster in tip of next cluster) twice; * ch 5, shell over shell, (ch 5, cluster in tip of next cluster) 6 times. Repeat from * around. Join.

24th rnd: Sl st to center of next sp, sc in same sp, * ch 4, in next sp make dc, ch 3 and dc; ch 4, sc in next sp, ch 4, shell over shell, ch 4, sc in next sp. Repeat from * around. Join.


25th rnd: Sl st in next 2 ch, sc in same loop, * ch 4, shell over shell, ch 4, sc in next sp, ch 3, sc in next sp. Repeat from * around. Join and break off.