Tuesday, February 26, 2013

Easter Eggs Bookmark, Filet Crochet Pattern


I am trying my hand at creating filet crochet patterns. I thought I should start with something as simple as a bookmark.

I made the chart using Microsoft Excel. It was quite easy.


And I set to work. I used size ten cotton thread and Boye size 7 steel hook. Usually, with size ten thread I use size ten hook, which produce tight stitches.

I like crocheting tightly, but this time I wanted to try looser stitches. As a result, my bookmark came out much bigger than I expected. It measures eight by three inches.

~~~~~~~~~~~~~~~~~~~~~~~~~~~~~~~~

More bookmark patterns from my shop:


Sunday, February 24, 2013

Lacy Baby Blanket Tutorial, Step 3


In this step we crochet Row 4.


We begin by executing the instructions prior to first *, which read:


dc in next dc.


That was quite simple. Next we need to work the instructions from * to second star *, which read:


*ch 3, sc in space between next 2nd and 3rd dc (it’s the space between two shells, and by shell I mean 3 dc worked in same space), ch 3, skip next 2 dc, 3 dc in next dc, 3 dc in next dc*


Probably the trickiest line here is “sc in space between next 2nd and 3rd dc (the space between two shells)”, look carefully at the picture below for visual help.


The picture below shows instructions from * to second * worked one time.


Worked two times.


Worked four times. We need to work these instructions the total of 12 times.


After we worked the instructions from * to second * 12 times, the row is not finished yet.


We finish Row 4 by executing the instructions after second *, which read:


ch 3, sc in space between next 2nd and 3rd dc (the space between two shells), ch 3, skip next 2 dc, dc in next 2 dc. Ch 2, turn.


The Row 4 is complete!

And we can see our overall lacy pattern taking its form.


I will post Step 4 next week.

Wednesday, February 20, 2013

Doily for St Patrick’s Day

Do you decorate your home for St Patrick’s Day? I usually don’t, but this year will be different. My oldest son is four year olds now, and he really enjoys all the holidays and festivities. 

But being a frugal mom, I’m not rushing to the store to buy St Patrick’s Day decorations. Instead, we will make them ourselves. Cutting shamrock and clover leaves out of paper is easy and fun for kids, and doesn’t cost anything.  

In my stash of yarns and threads, I found a bit of green cotton thread, just enough for a small doily. And here is what I produced – a perfect small doily for St Patrick’s Day!


The doily pattern is called Four Leaf Clover and was designed by Patrizia Pisani. Click here for the pattern.

I had a bit of trouble with those four overlapping circles and had to try a few times. Also, in the pattern it says that single crochets must be used to make those rings, but on the picture provided it looks like double crochets were used. I tried single crochets, but it didn’t look anything close to the picture. But when I used double crochets instead, it looked identical to the picture. Perhaps, it was a typo in the pattern.

I'm linking to
Show and Tell Friday @ My Romantic Home,
Adorned From Above Blog Hop @ Adorned From Above
Link Your Stuff @ Annamarie's Haakblog
Home Sweet Home Friday @The Charm of Home,
and Did You Make It?

Sunday, February 17, 2013

Lacy Baby Blanket Tutorial, Step 2


In this step we crochet Row 2 and Row 3 of the pattern.


We begin Row 2 by executing the instructions prior to first *, which read:


3 dc in next dc, skip 4 dc, 3 dc in next dc


Next we execute the instructions from * to second *, which read:


*ch 3, sc in next sc, ch 3, 3 dc in next dc, skip 4 dc, 3 dc in next dc*


The picture below shows the instructions from * to second * worked 2 times.


We need to work them a total of 12 times.


After we worked the instructions from * to second * 12 times, what we have left of the previous row is only one dc (actually, it’s a chain, but we are going to refer to turning chains as last dc).


And now we finish Row 2 by executing the instruction after second *, which read:


dc in last dc. Ch 2, turn.


Row 2 is complete!


When you stretch your work on a surface, you should see 13 pattern repeats. The picture below shows 4 pattern repeats.


We can now work on our next row, which is Row 3. This is going to be easy because Row 3 is exactly the same as Row 2.


Here is a close-up.


Once again when you finish Row 3 and stretch your work on a surface, you should see 13 pattern repeats.

The picture below shows 5 pattern repeats. 


We can now see how the pattern begins to form.


I’ll be happy to answer your questions or give further explanations. Let me know in the comments below if you need help with Row 2 and Row 3.

Friday, February 15, 2013

V-Stitch Newborn Beanie, Free Crochet Pattern


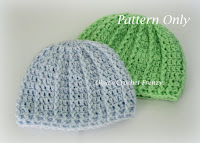
This newborn beanie measures 13 inches in circumference and 5 inches in height.


I used Snuggly Wuggly yarn by Loops & Threads (my leftover yarn from Lacy Baby Blanket) and US size E/4 (3.50 MM) hook.


This pattern is my original design. It cannot be posted on other sites or distributed in any other form. If you would like to share this pattern, you can post ONE image on your site with the link to my original post. You can use this pattern to make items for personal use or for sale. If you sell finished items from this pattern, you must give design credit to Lacy Crochet blog (lacycrochet.blogspot.com). Please, respect my work. Thank you!


For this pattern, gauge is very important. The first three rounds measure 3.5 inches in diameter.


If your gauge will be slightly bigger, you will get a bigger size beanie (size 0 – 3 months). However, if your gauge is smaller, I’m afraid your beanie will be too small.


Before we get to the pattern, let’s review what a V-st is. It is crocheted in the following manner:


(dc, ch 1, dc) worked all in the same space or stitch.


In this pattern, V-stitches are worked either
  • into V-stitches of the previous round (that is, into ch-1 space between 2 dc) or
  • into space between two V-stitches of the previous round (that is, into space prior to next V-stitch).


Ch 5, join with sl st into ring.


Round 1: Ch 4, *dc in ring, ch 1* 11 times. Join with sl st into 3rd ch of beginning ch-4.


Round 2: Sl st into next ch-1 space, ch 4, dc in same ch-1 space (counts as 1st V-st), V-st in each ch-1 space around. Join with sl st into 3rd ch of beginning ch-4. (12 V-st)


Round 3:  Sl st into next ch-1 space, ch 4, dc in same ch-1 space, V-st into next space between two V-st of previous round, *V-st into next 2 V-st, V-st into next space between two V-st of previous round* 5 times, V-st into next V-st. Join with sl st into 3rd ch of beginning ch-4. (18 V-st)


Round 4: Sl st into next ch-1 space, ch 4, dc in same ch-1 space, V-st into each V-st around. Join with sl st into 3rd ch of beginning ch-4.


Rounds 5 – 11 same as Round 4.


Round 12: Ch 1, *sc in next V-st, sc in next space between two V-st* around. Join with sl st into beginning ch-1.


Fasten off.


More baby beanie patterns from my shop:


Wednesday, February 13, 2013

Crocheted Heart

I wasn’t sure I like this heart when I was crocheting it. I used thick cotton yarn and the stitches were coming out uneven and not very pretty. But once I added the trim, I loved the heart!

There is something charming about its rustic look.  

You can see the pattern for this heart here.


Happy Valentine’s Day!

I'm linking to Teach Me Tuesday Link-Up @ Growing Home,
Home Sweet Home Friday @The Charm of Home,
Show and Tell Friday @ My Romantic Home,
 

Monday, February 11, 2013

Lacy Baby Blanket Tutorial, Step 1


I have made a detailed tutorial for the Lacy Baby Blanket, which is the most popular item on my blog. The tutorial consists of several steps (nine to be exact) as it is too big a project to fit into one post.


I believe even beginning crocheters can make this blanket following my tutorial (as long as you are familiar with basic crochet stitches).


So if you’d like to make this blanket with me, print out the pattern, gather your supplies and let’s begin!


In this step we get started by making a chain and crocheting the first row of the pattern.


Ch 146 loosely.


Keep your printed-out pattern at hand and refer to it as often as you need to.


We start the first row by making 3 dc in sixth ch from hook (note that the chain on the hook doesn’t count). Then we skip 4 chains and make 3 dc in the next chain. See the picture below.


Now we are going to work the instructions from * to second *, which read:


*ch 3, skip 2 ch, sc in next ch, ch 3, skip 2 ch, 3 dc in next ch, skip 4 ch, 3 dc in next ch*


We need to repeat working the instructions from * to second * across. That will be 12 times in total.


The picture below shows the instructions from * to second *  worked two times. 


Once you have repeated the instructions from * to second * 3-4 times, you probably will be able to memorize them and won’t need to look at the pattern.


When you have crocheted these instructions 12 times, you will see that you have 3 ch left. See picture below.


We are going to finish the row following the instructions after second *, which read:


sk 2 ch, dc in last ch


And make ch 2 for turning.


The first row of our blanket is finished!


If you stretch it on a surface, you should see 13 pattern repeats. Below, I show a picture of three pattern repeats to give you an idea of what I mean.


If you have any questions, don’t hesitate to ask in the comments below.

I'll post Step 2 next week.

Wednesday, February 6, 2013

Valentine’s Day Crochet Projects


I can’t believe that Valentine’s Day is just around the corner!


This year I don’t have much time to experiment and come up with my own Valentine’s Day patterns, so instead I searched the web to see what free patterns I could find.

The doily pattern is called Hearts Desire and is from Red Heart.

The pattern for the heart (symbol chart only) is from Tesourinha blog.

And finally tutorial for the tiny heart is from PinkFluffyWarrior blog. The tutorial is written using UK crochet terms; nevertheless, I managed to follow the pattern.


What are you crocheting for Valentine's Day?

I'm linking to
Adorned From Above Blog Hop @ Adorned From Above
Show and Tell Friday @ My Romantic Home,
Link Your Stuff @ Annamarie's Haakblog
Home Sweet Home Friday @The Charm of Home,
and Did You Make It?