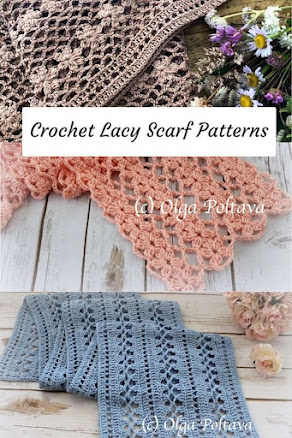
One of the readers, a beginner crocheter, asked for help with the stitch that I used for my Lovely Shells Baby Blanket.
So here is the photo tutorial! I hope it will be useful.
The amount of chains for this stitch must be
divisible by 5, plus 1 additional chain.
For example, to make the sample shown in the
pictures I started with ch 31.
Row 1. Skip 7 ch (remember that the chain on the hook
doesn’t count) and make (dc, ch 3, dc) all in 8th ch.
Ch 1, skip 4 ch, and again make (dc, ch 3, dc) all
in next ch.
Again ch 1, skip 4 ch, (dc, ch 3, dc) all in next
ch. Continue in the same manner across.
At the end of the row, skip 2 ch, make dc in last
ch.
Ch 3, turn.
Row 2. In the next ch-3 space, make (dc, ch 1) four times,
and additional dc. That’s how a shell is made.
In the same manner, make shells in each ch-3 space
across.
At the end of the row, skip 1 ch, and make dc into next ch.
Ch 4, turn.
Row 3. Make (dc, ch 3, dc) all into the 3rd dc
of dc-5 group.
Then make ch 1, and again (dc, ch 3, dc) all into
the 3rd dc of next dc-5 group. Continue in the same manner across.
At the end of the row, make ch 1, dc in last dc.
Ch 3, turn. Next just repeat Row 2 and Row 3.


.jpeg)


.jpeg)


I love this stitch!!
ReplyDeletexo Kris
Bellisimo punto para una mantilla, estoy haciendo algo parecido en blanco pero todavía me falta bastante , quería contarte que te tengo un lindo regalito en mi blog te lo mereces por tantas maravillas que haces besitos.
ReplyDeleteThanks so much for the tutorial. I am a beginner too and feel confident to test out this stitch. Do you think it would be ok for a lacy looking scarf. Our winters in Australia aren't snowy so I can wear something lacy. I want to quickly make a pretty scarf . Thanks Linny
ReplyDeleteYou are welcome! I think a scarf in this stitch will look lovely.
DeleteHi there, going to give this pattern a try, see another scarf in the making hahaha
ReplyDeleteun punto muy bonito y un tutorial muy bien explicado!! gracias;un besito.maria:)
ReplyDeleteThanks! This is a great tutorial!
ReplyDeleteОльга, хороший урок по вязанию крючком. Спасибо.
ReplyDeletePerfect tutorial, thank you so much.
ReplyDeleteHugs,
Meredith
This is a beautiful stitch! Thanks for the wonderful tutorial.
ReplyDeleteHugs!
I love theese tutorials.It is so helpful. Thanks you lovely crochetfriend.
ReplyDeleteExciting, I think tutorials like this are so helpful, I'm starting to learn how to understand the directions now...I love it Olga thank you ... can't wait to try this.. Happy Wednesday with love Janice
ReplyDeleteHola, encontré tu blog por intermedio de The Chicken Chick. nueva seguidora tuya via GFC. Este punto de crochet me encanta! Espero que estes de acuerdo, lo voy a agregar a uno de mis boards en pinterest. te invito a visitar mi blog y si te gustan mis creaciones me encantaria que te hagas follower mia!
ReplyDeleteEncantada de conocerte.
Marisa de el blog
http://passionetcouture.blogspot.ca/
Wow, At first glance I thought it would be hard and tedious but your tutorial makes it look easy. Thanks so much for sharing. I am pinning it!
ReplyDeletewww.mylittleshopoftreasures.blogspot.ca
www.darlenebnemeth.blogspot.ca
This is so easy to follow. The best tutorials I have found. I'm a beginner, only learned to crochet about 2 weeks ago. Thanks so much! x
ReplyDeleteOh, how I'm glad to hear/read such words!
DeleteAnd welcome to the world of Crochet!
Hello from Finland! I made a scarf using your pattern. Thank you, it's lovely! http://liiolii.blogspot.fi/2014/09/valmis-huivi-ja-toinen-aloitettu.html
ReplyDeleteIn row 2 you say dc chain 1, 4 times that only makes 4 dc and not 5
ReplyDeleteLove the stitch but could you please make it plain at the start that you are using the US crochet stitch names as when made using
ReplyDeletethe double crochet stitch mentioned instead of the treble stitch as it is called in other countries the end result looks totally different.
Love the stitch but could you please make it plain at the start that you are using the US crochet stitch names as when made using
ReplyDeletethe double crochet stitch mentioned instead of the treble stitch as it is called in other countries the end result looks totally different.