Thursday, December 18, 2014

Five Petal Crochet Flower


Here is an easy flower to make! The size will depend on the size of the yarn and hook you use. You can make big flowers with bulky yarn or tiny ones with crochet thread.


Ch 5, join in ring with sl st.

Round 1: ch 6, *dc in ring, ch 3* four times; join with sl st to 3rd ch of beginning ch-6.

Round 2: ch 3, 8 trb in next ch-3 space, ch 3, sl st in same ch-3 space, *sl st in next ch-3 space, ch 3, 8 trb in same ch-3 space, ch 3, sl st in same ch-3 space* four times.

Fasten off. 


Tuesday, December 9, 2014

Christmas Star Doily, Free Pattern


To make this doily I used crochet acrylic thread (Bernat Handicrafter) and size 4 (1.25 mm) crochet steel hook. My doily came out about 8 inches in diameter.

My free pattern is below. If you notice any mistakes, please let me know in the comments.


Ch 10, join in ring with sl st.


Round 1: ch 5, *dc in ring, ch 2* seven times, join with sl st to 3rd ch of beginning ch-5.


Round 2: ch 3, 2 dc in same space, ch 2, *3 dc in next dc, ch 2* around; join with sl st to 3rd ch of beginning ch-3.


Round 3: ch 3, dc in next dc, 2 dc in next dc, ch 2, *dc in next 2 dc, 2 dc in next dc, ch 2* around; join with sl st to 3rd ch of beginning ch-3.


Round 4: ch 3, dc in next 2 dc, 2 dc in next dc, ch 2, *dc in next 3 dc, 2 dc in next dc, ch 2* around; join with sl st to 3rd ch of beginning ch-3.


Round 5: ch 3, dc in next 3 dc, 2 dc in next dc, ch 2, *dc in next 4 dc, 2 dc in next dc, ch 2* around; join with sl st to 3rd ch of beginning ch-3.


Round 6: ch 3, dc in next 4 dc, 2 dc in next dc, ch 2, *dc in next 5 dc, 2 dc in next dc, ch 2* around; join with sl st to 3rd ch of beginning ch-3.


Round 7: ch 3, dc in next 5 dc, 2 dc in next dc, ch 2, *dc in next 5 dc, 2 dc in next dc, ch 2* around; join with sl st to 3rd ch of beginning ch-3.


Round 8: ch 3, dc in next 6 dc, 2 dc in next dc, ch 2, *dc in next 6 dc, 2 dc in next dc, ch 2* around; join with sl st to 3rd ch of beginning ch-3.


Round 9: sl st to next dc, ch 3, dc in next 7 dc, ch 5, skip next ch-2 and dc, *dc in next 8 dc, ch 5* around; join with sl st to 3rd ch of beginning ch-3.


Round 10: sl st to next dc, ch 3, dc in next 6 dc, ch 5, sc in next ch-5 space, ch 5, *skip next dc, dc in next 7 dc, ch 5, sc in next ch-5 space, ch 5* around; sl st to 3rd ch of beginning ch-3.


Round 11: sl st to next dc, ch 3, dc in next 5 dc, ch 5, {sc in next ch-5 space, ch 5} twice, *skip next dc, dc in next 6 dc, ch 5, {sc in next ch-5 space, ch 5} twice * around; join with sl st 3rd ch of beginning ch-3.


Round 12: sl st to next dc, ch 3, dc in next 4 dc, ch 5, {sc in next ch-5 space, ch 5} three times, *skip next dc, dc in next 5 dc, ch 5, {sc in next ch-5 space, ch 5} three times * around; join with sl st to 3rd ch of beginning ch-3.


Round 13: sl st to next dc, ch 3, dc in next 3 dc, ch 5, {sc in next ch-5 space, ch 5} four times, *skip next dc, dc in next 4 dc, ch 5, {sc in next ch-5 space, ch 5} four times * around; join with sl st to 3rd ch of beginning ch-3.


Round 14: sl st to next dc, ch 3, dc in next 2 dc, ch 5, {sc in next ch-5 space, ch 5} five times, *skip next dc, dc in next 3 dc, ch 5, {sc in next ch-5 space, ch 5} five times * around; join with sl st to 3rd ch of beginning ch-3.


Round 15: sl st to next dc, ch 3, dc in next dc, ch 5, {sc in next ch-5 space, ch 5} six time, *skip next dc, dc in next 2 dc, ch 5, {sc in next ch-5 space, ch 5} six times * around; join with sl st to 3rd ch of beginingh ch-3.


Round 16: sl st to middle of next ch-5 space, sc in same space, ch 5, *sc in next ch-5 space, ch 5* around; join with sl st to 1st sc.


Fasten off. 


I'm linking this post to
Create It Thursday @ Lamberts Lately
Craft Schooling Sunday @ Crative Jewish Mom
Show and Tell Friday @ My Romantic Home,
The Homemaking Party @ Hope in Every Season

Wednesday, December 3, 2014

New Preemie Patterns


I recently added a few preemie patterns to my Etsy and Craftsy stores.


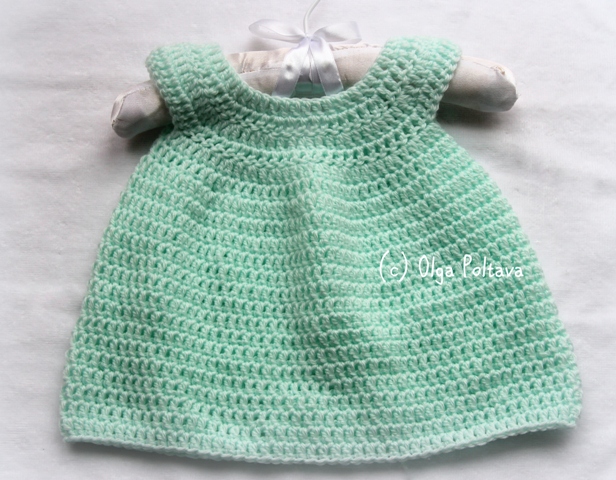
This preemie dress is made with light worsted baby yarn and size F hook. It’s very easy and quick to make, and only basic stitches (dc, sc, sl st, ch) were used in this pattern. The dress is quite small; it will also fit a 20-inch doll.


The preemie hats are made with cluster stitch. Again they are made with light worsted baby yarn and size F hook. The measurements are about 11 inches in circumference and 4 inches in height.
A similar pattern in size 3-6 months is also available in my shops.


And the last pattern is a super easy to make diaper cover. It’s made with very soft cotton yarn and size H hook.


Thank you for stopping by and enjoy the Holiday Season!


Thursday, November 13, 2014

Small Star Doily, Free Pattern


This doily measures about 7 inches in diameter (across). I used size ten cotton thread and 1.2 mm hook. My free pattern is below.  


Ch 8, join in ring with sl st.


Round 1: ch 4 (counts as 1st tr), 2 tr in ring, ch 3, *3 tr in ring, ch 3* five times; join with sl st to 4th ch of beginning ch-4.


Round 2: ch 4 (counts as 1st tr), 2 tr in same space, tr in next tr, 3 tr in next tr, ch 3, skip next ch-3 space, *3 tr in next tr, tr in next tr, 3 tr in next tr, ch 3, skip next ch-3 space* five times; join with sl st to 4th ch of beginning ch-4.


Round 3: ch 4 (counts as 1st tr), 2 tr in same space, tr in next 5 tr, 3 tr in next tr, ch 3, skip next ch-3 space, *3 tr in next tr, tr in next 5 tr, 3 tr in next tr, ch 3, skip next ch-3 space* five times; join with sl st to 4th ch of beginning ch-4.


Round 4: ch 4 (counts as 1st tr), 2 tr in same space, tr in next 9 tr, 3 tr in next tr, ch 3, skip next ch-3 space, *3 tr in next tr, tr in next 9 tr, 3 tr in next tr, ch 3, skip next ch-3 space* five times; join with sl st to 4th ch of beginning ch-4.


Round 5: sl st to 3rd tr, ch 4 (counts as 1st tr), tr in next 10 tr, ch 7, skip next 2 tr, sc in next ch-3 space, ch 7, *skip next 2 tr, tr in next 11 tr, ch 7, skip next 2 tr, sc in next ch-3 space, ch 7* five times; join with sl st to 4th ch of beginning ch-4.


Round 6: sl st to 3rd tr, ch 4 (counts as 1st tr), tr in next 6 tr, ch 7, skip next 2 tr, {sc in next ch-7 space, ch 7} twice, *skip next 2 tr, tr in next 7 tr, ch 7, skip next 2 tr, {sc in next ch-7 space, ch 7} twice * five times; join with sl st to 4th ch of beginning ch-4.


Round 7: sl st to 3rd tr, ch 4 (counts as 1st tr), tr in next 2 tr, ch 7, skip next 2 tr, {sc in next ch-7 space, ch 7} three times, *skip next 2 tr, tr in next 3 tr, ch 7, skip next 2 tr, {sc in next ch-7 space, ch 7} three times * five times; join with sl st to 4th ch of beginning ch-4.


Round 8: sl st to middle of next ch-7 loop, *ch 3, picot, ch 4, sc in next ch-7 loop* around; join with sl st in middle of first ch-7 loop.


Fasten off.

Monday, November 10, 2014

A Bit of This and That


Hello Crafty Friends,


Just look at this gorgeous baby blanket!  


One of the readers, whose name is Sharon, sent me these photos. She used my Fancy Shells pattern as the main stitch for this baby afghan. Then she added several rounds of border in three colors (green, white, and pink) and a final round of beautiful shells. Notice the roses and leaves; don’t they make a lovely detail?


When I saw these photos in my mail box, it really made my day. It’s rewarding to know that my patterns are useful to other crocheters. Thank you Sharon for sharing your work with me and for allowing me to share the photos on my blog with others.

Another reader asked me to post a close-up photo for the motif used in this vintage crochet piece, which I gladly do.


And this is a project in progress. I’m working on a pattern for a doily, which I will share soon.


Thank you for stopping by and have a wonderful week!

Thursday, October 2, 2014

Two New Patterns: Baby Dress and Girls Hat


Hello fellow crafters,

I recently added a couple of new patterns to my Etsy and Craftsy shops.


The first one is a baby dress made with crochet cotton thread size ten in two strands and crochet hook size D (3.25 mm). This pattern involves 2-dc clusters and 3-dc clusters. The size is approximately 3-6 months. The dress has an opening with a small button on the back. I wrote a very detailed pattern including stitch count for each row and round.


The second pattern is for a crochet girl's hat size 3-5 years old, made with 100% acrylic yarn. The skill level for this hat is beginner. The hat itself is very easy to make (the pattern is very detailed and includes stitch count). However, the flower is a bit complicated.

Monday, September 15, 2014

Things are Getting Better and My New Baby Blanket Pattern


Dear Friends, hello!

First of all I want to thank you all for your positive thoughts and prayers on my father’s surgery. It went well and now he is slowly recovering and gaining back his strength.


I have a new pattern in my Etsy and Craftsy shops. This baby blanket is super easy and quick to make. The stitches involved are only chains, single crochets, and double crochets. And what can be easier than that?


The pattern looks slightly different, but equally pretty, on the right and wrong sides. I used my favorite 100% acrylic yarn Snuggly Wuggly by Loops and Threads, but other acrylic yarns of your choice should work well


I also have a new pattern for a baby dress, but I still need to put it all together. 

Thank you for stopping by and have a nice week!

Monday, August 18, 2014

Simple Crochet Motif and Lacy Tray Cloth, Free Vintage Pattern


Here is a simple motif that can be used to make a fancy tray lining or cloth.


Photo Credit: New Ideas in Crochet, Table Topics, Book 123,
The Spool Cotton Company, 1938


The pattern is from The Spool Cotton Company Book #123, New Ideas in Crochet, Table Topics, 1938.


First Strip. First Motif… Starting at center, ch 8. Join with sl st to form ring. 1st rnd: Ch 3, 4 dc in ring, *ch 5, 5 dc in ring. Repeat from * 2 more times, ch 5. Join with sl st to 3rd st of ch-3 first made. 2nd rnd: sl st in each of next 4 dc, sl st in ch-5 loop, ch 3, 2 dc in same loop, ch 3, 3 dc in same loop (corner); *ch 3, skip next 2 dc, sc in next dc, ch 3; in next ch-5 loop make 3 dc, ch 3, 3 dc. Repeat from * around, ending with ch 3, sl st in 3rd st of ch-3 first made. 3rd rnd: sl st in each of next 2 dc, sl st in ch-3 sp, ch 3, 2 dc in same sp, ch 3, 3 dc in same sp, *ch 3, sc in next ch-3 loop, ch 3, sc in next ch-3 loop, ch 3; in corner ch-3 make 3 dc, ch 3, 3 dc. Repeat from * around, ending with ch 3. Join with sl st to 3rd st of ch-3 first made. 4th rnd: sl st in each of next 2 dc, sl st in corner ch-3 sp, ch 3, 2 dc in same sp, ch 3, 3 dc in same sp, *ch 3, sc in next ch-3 loop, ch 2, 2 half dc in next ch-3 loop, ch 2, sc in next ch-3 loop, ch 3; in corner ch-3 make 3 dc, ch 3, 3 dc. Repeat from * around, ending with ch 3. Join with sl st to 3rd st of ch-3 first made. Fasten and break off. This completes one motif.


Second Motif… Work as for first motif to 3rd rnd incl. 4th rnd: sl st in each of next 2 dc, sl st in ch-3 sp, ch 3, 2 dc in same sp, ch 1, sc in corner ch-3 of first motif, ch 1, 3 dc back in corner ch-3 of second motif, ch 3, sc in next loop, ch 2, half dc in next loop, sc between 2 half dc of first motif, half dc back in same loop of second motif, ch 2, sc in next loop, ch 3, 3 dc in corner ch-3 sp, ch 1, sc back in corner loop of first motif, ch 1, 3 dc back in corner loop of second motif (thus second motif is joined to first). Complete rnd as for first motif.


Make 7 more motifs, joining to previous one as second was joined to first.


Second Strip. First Motif… Work as for second motif of first strip, joining on last rnd to lower edge of first motif of fist strip.

Second Motif… Join on last rnd to lower edge of second motif of first strip, and to adjacent side of first motif of second strip.


Continue in this manner until there are 14 strips of 9 motifs. Attach thread to outer edge, and work a rnd of sc closely together all around outer edges, keeping work flat.

  
I'm linking this post to Tweak It Tuesday @ Cozy Little House,
Clever Chicks Blog Hop at The Chicken Chick
Show and Tell Friday @ My Romantic Home,
Adorned From Above Blog Hop @ Adorned From Above
Link Your Stuff @ Annamarie's Haakblog
Home Sweet Home Friday @The Charm of Home,


Thursday, August 14, 2014

Preemie Baby Crochet Hats


One of the customers from my Etsy shop contacted me asking about preemie patterns, and I realized that I didn’t have any. I added “preemie patterns” to my list of crochet ideas and projects to do. And this is the first preemie pattern that I’ve made.

I used size F crochet hook and baby sport yarn (Beehive Baby Sport by Patons). The finished hat measures approximately 13 inches in circumference, and 5 inches in height, quite small.

I used the same stitch that I used for the last baby blanket I made. And I love how this beanie turned out. I made five of them as I wanted to try different color combinations. It also looks cute when made with variegated yarn.

 I will be mailing these preemie baby hats to Stitches from the Heart charity.


Wednesday, August 6, 2014

Vintage Lace Crochet Edging


The pattern for this edging is from Star Book 66, Crochet and Tatting Heirloom Edition by American Thread Company, 1949. The pattern’s name is Crochet Edging #6603.

I have no particular use in mind for the piece that I made. I just wanted to try this pattern to get the idea what this edging looks like and if I can then adapt it for some other projects. I like how it looks and even though it’s a bit tedious to make all those picots, I might use it later for a hankie edging.

I found this vintage patter difficult to follow. And when I inspected my finished piece, I realized I made a mistake in the last row (each loop must have three picots, but I only made two). I suppose this is what is called an “old school crochet pattern”. One has to be really careful when reading/following the instructions.


I post the pattern exactly as it appears in the original publication.


Ch for desired length, dc in 8th st from hook, *ch 2, skip 2 sts of ch, dc in next st, repeat from * across row, ch 5, turn.

2nd Row - *Dc in next dc, dc in next dc, ch 5, repeat from * across row ending with dc in 3rd st of ch, ch 7, turn.

3rd Row – Sc in next dc, *ch 7, sc in 1st dc of next 2 dc group, repeat from * across row, ch 1, turn.

4th Row – 3 sc, ch 4 (picot loop), 3 sc, ch 4, 3 sc over 1st loop, 3 sc, ch 4, 2 sc over next loop, ch 8, turn, skip 2 picot loops, sl st in center st between picots of 1st loop, ch 1, turn and work 3 sc, ch 4, 2 sc, ch 4, 2 sc, ch 4, 3 sc over loop just made, sl st in last sc of previous loop, 1 sc, ch 4, 3 sc over remainder of same loop, repeat from beginning across row, break thread.


Monday, August 4, 2014

Back to Blogging and Lacy Fans Crochet Stitch


Hello Crafty Friends,

Some of you might wonder where I disappeared and why I have neglected my blog for so long. The truth is the past several weeks have been trying for me and my family.

Not a day passes by without me thinking about the heartbreaking events in Eastern Ukraine. This is the land where I was born and grew up. It’s so painful to know that people I once knew (neighbors, teachers, classmates, etc) are losing their homes, and even their lives. It was such a horrible tragedy when so many innocent people died when the Malaysian aircraft was taken down. The conflict in Israel is just as heartbreaking… And there is more sad news on a personal level – my father’s health is declining and he is going to have a serious surgery in a week or so.   

Honestly, I haven’t felt much like crocheting or blogging lately. But now I actually want to reignite this passion of mine. I want to keep myself busy as much as possible in order to keep down the amount of negative and depressing thoughts I have.  

I want to focus on creating new baby and especially preemie patterns! I also want to explore and learn new crochet stitches and techniques. And even though I already have a huge collection of doilies, I still want to make more! Hopefully, I’ll follow through with my intentions!


I have something to share with you today! This lacy stitch is quite simple, and only basic stitches are involved. 


Multiple of 12, plus 2

In this pattern, I refer to turning chains as last dc. 

To make the swatch shown in the pictures, I started with ch 38.

Row 1: dc in 3rd ch from hook, dc in each ch across.

Row 2: ch 3, turn; 2 dc in 1st dc, ch 2, skip next 3 dc, sc in next dc, ch 5, skip next 3 dc, sc in next dc, ch 2, skip next 3 dc, *5 dc in next dc, ch 2, skip next 3 dc, sc in next dc, ch 5, skip next 3 dc, sc in next dc, ch 2, skip next 3 dc* across, 3 dc in last dc.

Row 3: ch 3, turn; dc in 2nd dc, ch 1, dc in next dc, ch 2, sc in next ch-5 space, ch 2, *{dc in next dc, ch 1} four times, dc in next dc, ch 2, sc in next ch-5 space, ch 2* across, {dc in next dc, ch 1} twice, dc in last dc.

Row 4: ch 4, turn; dc in 2nd dc, ch 2, dc in next dc, *{dc in next dc, ch 2} four times, dc in next dc* across, {dc in next dc, ch 2} twice, dc in last dc.

Row 5: ch 3, turn; 2 dc in next ch-2 space, dc in next dc, 2 dc in next ch-2 space, dc in space between next 2 dc, *{2 dc in next ch-2 space, dc in next dc} three times, 2 dc in next ch-2 space, dc in space between next 2 dc * across, 2 dc in next ch-2 space, dc in next dc, 3 dc in last ch space. 

Row 6: ch 3, turn; 2 dc in 1st dc, ch 2, skip next 3 dc, sc in next dc, ch 5, skip next 3 dc, sc in next dc, ch 2, skip next 3 dc, *5 dc in next dc, ch 2, skip next 3 dc, sc in next dc, ch 5, skip next 3 dc, sc in next dc, ch 2, skip next 3 dc* across, 3 dc in last dc.  

Repeat Rows 3-6.  


Monday, July 21, 2014

Preschooler Boy Crochet Hat, My New Pattern


It’s only July, but I’m already crocheting things for autumn.

This is the hat I made for my youngest son, who is three. Actually, this hat has a nice stretchable texture and it fits my older son, who is five, as well. So the size is 3 to 5 years old.

The final hat measures about 20 inches in circumference and 7.5 inches in height. 

This is not an easy project! You must be very comfortable working with front post and back post double crochets. I found that it’s quite tricky to work 2 back/front post double crochets into 1 back/front post double crochet. But it is possible!

The yarn that I used for this hat was Bernat Softee Baby (100% acrylic) in grey color. I used up about half the skein, somewhere around 170 yards. This yarn was perfect for this project. The hat is soft to touch and stretchable.

The little model in the photos is my son Niko. He didn’t quite get it why mommy wanted him to wear a hat and a jacket in summer heat. But once I mentioned a popsicle as a reward, he was happy to smile at the camera. Isn’t he a charmer?

I really enjoyed working on this project, and I love how it turned out. I have a few more autumn/winter projects in mind – a similar beanie for my older son, and maybe some slouchy hats for both of them. I also have a beautiful baby alpaca wool yarn in my stash, which would be perfect for a new scarf or cowl for myself. 


The pattern for this hat is available in my Etsy and Craftsy shops. 


I'm linking this post to
Link Your Stuff @ Annamarie's Haakblog

Friday, July 11, 2014

Lilac Baby Blanket, my new pattern


Hello crafty friends! Here is my new baby blanket, which I finished just a couple of days ago.


The yarn that I used is my favorite Snuggly Wuggly Big by Loops and Threads. I usually buy it from my local Michael’s store, where it’s sold for 9.99. But I installed Michael’s Weekly Ad app on my phone, and now I almost always have a 40% off coupon on hand. That’s a pretty good deal!

 
The pattern of this blanket is very simple and easy to remember, and it looks the same on both sides. This is the kind of project where after the first couple of rows you just repeat the same instructions over and over and don’t need to worry about counting the stitches.


I have a few baby blankets that I was going to donate, but after reading the baby blanket charity guidelines, I realized the designs of my blankets are too open/lacy. But this one should be a good fit. I still don’t know what I will do with the lacy ones. Perhaps I’ll unravel them and make new ones using some tighter stitches.


The pattern for this blanket is availbe in my Etsy and Craftsy shops. 

Thursday, July 3, 2014

Summer Doily


Summer is in its prime here in California. I have a lot of yellow-and-red gladioluses blooming in my garden. They are like soldiers standing tall and enduring the hot weather. I like their cheerful and warm colors. And butterflies and hummingbirds are frequent guests in my garden these days. 

All this inspired me to put on hold the autumn hat for my son that I was working on and make something summer-like.


The free pattern (symbol chart) was from Anabelia Craft Design blog. I discovered this blog a couple of months ago, and I really love it. There are so many wonderful projects and free patterns there.


I hope your summer (or winter if you are in the Southern hemisphere) is going well, and you too are enjoying whatever the nature has to offer!

~~~~~~~~~~~~~~~~~~~~~~~~~~~~~~~~~~

I wanted to let you know that I no longer update Lacy Crochet Facebook and Twitter accounts. To be honest I still don't quite understand the rationale behind all these social media channels and how exactly they are supposed to work. For example, I noticed that a very small percentage of my FB followers actually get to see my posts. Then what's the point of posting updates? 
I'm trying to cut down the overall time I spend on the Internet, so leaving Facebook and Twitter seems like a good start.  


I'm linking this post to
Link and Share Wednesday @ Oombawka Deseigns 
Create It Thursday @ Lamberts Lately
Craft Schooling Sunday @ Crative Jewish Mom
Show and Tell Friday @ My Romantic Home,
The Homemaking Party @ Hope in Every Season

Thursday, June 26, 2014

4th of July Crochet Stars


I made a few crochet stars for the 4th of July!


Originally, I planned to make a whole bunch of them for a bunting to hang over my mantelpiece. When I finished three stars I decided to see what they are going to look like. Quite nice!

Moreover, I think three would be enough. Perhaps next year I’ll make a few more.


I pulled out my red-white-and-blue doily that I made last year (the pattern is here), and it too found a place on the mantel.


I think the stars on one side and the doily on the other would be sufficient. I might add a couple of more decorations to the middle, but not crochet ones. Everything should be in moderation!


The pattern is very simple and only has four rounds. I used 1.25 mm hook and size 10 cotton thread (except for the red, which is an acrylic thread as I didn't have red cotton on hand).


Ch 5, join in ring with sl st.


Round 1: ch 6, *dc, ch 3* four times; join with sl st to 3rd ch of beg ch-6.


Round 2: sl st in next ch-3 space, ch 3, (2 dc, ch 3, 3 dc) all in same ch-3 space, *(3 dc, ch 3, 3 dc) all in next ch-3 space* four times; join with sl st to 3rd ch of beg ch-3.


Round 3: sl st in next dc, ch 3, dc in next dc, (3 dc, ch 3, 3 dc) all in next ch-3 space, dc in next 2 dc, skip 2 dc, *dc in next 2 dc, (3 dc, ch 3, 3 dc) all in next ch-3 space, dc in next 2 dc, skip 2 dc* four times; join with sl st to 3rd ch of beg ch-3.


Round 4: sl st in next dc, ch 3, dc in next 3 dc, (3 dc, ch 3, 3 dc) all in next ch-3 space, dc in next 4 dc, skip 2 dc, *dc in next 4 dc, (3 dc, ch 3, 3 dc) all in next ch-3 space, dc in next 4 dc, skip 2 dc* four times; join with sl st to 3rd ch of beg ch-3.


Fasten off.


 ~~~~~~~~~~~~~~~~~~~~~~~

 Kathryn Vercillo, a crochet blogger from San Francisco and author of the book Crochet Saved My Life, asked me to help her spread the word about a crochet health survey that has been launched recently. To read the press release or take the survey, please visit Crochet Concupiscence.


I'm linking this post to
Link and Share Wednesday @ Oombawka Deseigns 
Create It Thursday @ Lamberts Lately
Link Your Stuff @ Annamarie's Haakblog
Craft Schooling Sunday @ Crative Jewish Mom
Show and Tell Friday @ My Romantic Home,
The Homemaking Party @ Hope in Every Season

Thursday, June 19, 2014

Small Doily Motif and Crochet Tablecloth Free Vintage Pattern


Today I want to share a free vintage pattern for a gorgeous tablecloth called Star Wheel #744. The pattern comes from The Spool Cotton Company Book #123, New Ideas in Crochet, Table Topics, 1938.

It’s been a long time since 1938, but nonetheless I believe this pattern would be exciting and of great interest to thread crochet masters in our time!

I made the motif using size ten crochet cotton thread and 1.3 mm hook. My motif came out 5.5 inches in diameter. The pattern was easy enough to follow. The only challenge was the 2nd round; I had to read it very carefully a couple of times before I got it.


My motif turned out very pretty, and I can imagine what a stunning tablecloth can come out of it. I got quite tempted to start this project, but then I reminded myself that I already have one unfinished tablecloth…

I repost the pattern exactly as it appears in the original publication.

Photo Credit: New Ideas in Crochet, Table Topics, Book 123,
The Spool Cotton Company, 1938


Materials: Choose one of the following threads in size 20, White or Ecru:
Clark’s O.N.T. Mercerized Crochet, 74 balls.
J. & P. Coats Mercerized Crochet, 53 balls.
J. & P. Coats Big Ball Best Six Cord Mercerized Crochet, 31 balls.

Milward’s steel crochet hook number 9 or 10.

Gauge: One large motif measures 4.25 inches in diameter and requires about 25 yards of thread. Each fill-in-lace requires about 4 yards of thread. When completed, tablecloth measures about 68 x 85 inches. Make 320 large motifs, then join them together as explained later.

Motif… Ch 10 and join with sl st to form ring. 1st rnd: Ch 3, 23 dc in ring. Join with sl st to 3rd st of ch-3 first made. 2nd rnd: Ch 10, and complete a cross st as follows: Thread over twice, insert hook in 8th ch from hook, draw thread through (4 loops on hook), thread over once, skip 1 dc and insert hook in next dc, draw thread through (6 loops on hook), thread over, and take off 2 loops at a time, 5 times. *Ch 3, thread over 4 times, insert hook in next dc and draw thread through (6 loops on hook), thread over, and take off 2 loops at a time, then thread over, skip 1 dc, insert hook in next, draw thread through (6 loops on hook), thread over, and take off 2 loops at a time, 5 times. Ch 3, dc in center point of the cross, thus completing the cross. Repeat from * until there are 8 cross sts around the circle. Join last ch-3 with sl st to 7th st of ch-10 first made. 3rd rnd: 5 sc in each sp. 4th to 7th rnds incl: Sc in each sc of previous rnd. 8th rnd: Ch 4, dc in 1st sc, * ch 1, dc in next sc, repeat from * to end of rnd. Then ch 1, and join with sl stto 3rd st of ch-4 first made. 9th rnd: Ch 10, and complete cross st as before, skipping 2 dc between each leg of cross st and inserting hook under ch-1 sp. Ch 3 between each cross st. Skip 2 dc between each cross st. Repeat around (20 cross sts) and join last ch-3 with sl st to 7th st of ch-10 first made. 10th rnd: Sl st in 1st 2 sts of first sp, ch 5, *dc in same space, ch 3, sc in next sp, ch 3, dc in next sp, ch 2, repeat from * to end or rnd. Join last ch 3 with sl st to 3rd st of ch-5 first made. 11th rnd: Ch 6, dc in same sp, * ch 4, sc in next sc of previous rnd, ch 4, dc in next ch-2 sp, ch 3, dc in same sp, repeat from * to end of rnd, joining with sl st to 3rd st of ch-6 first made.

To join motifs… Place motifs in position (16 x 20 motifs). With over-and-over stitches, sew 3 points of one motif to corresponding 3 points of the adjacent motif (thus leaving 2 points free on each motif). To make fill-in lace between the motifs, ch 4, join with sl st to form ring. ** Ch 15, sc at joining of two motifs, ch 15, sc in center ring, * ch 9, sc in point of next scallop, ch 9, sc in center ring, repeat from * once more. Then repeat from ** 3 more times. This completes the fill-in lace. Break off thread.

I'm linking this post to
Link and Share Wednesday @ Oombawka Deseigns 
Create It Thursday @ Lamberts Lately
Link Your Stuff @ Annamarie's Haakblog
Craft Schooling Sunday @ Crative Jewish Mom
Show and Tell Friday @ My Romantic Home,
The Homemaking Party @ Hope in Every Season